Living a Simple Life with a Back Porch View
Grab a glass of lemonade and settle in for a visit! Listen to stories designed to encourage, uplift, and help you Live a Simple Life with a Back Porch View. Find out what that means, and how to shift your own lifestyle. Then relax and enjoy while learning the different aspects of a Simple Life - from following your dreams and passions to handcrafting, cooking, tending to the home and garden, and more. And from time to time, there will even be a recipe and freebie or two!
Living a Simple Life with a Back Porch View
Plan(t) It Better - Getting Your Garden Started
Use Left/Right to seek, Home/End to jump to start or end. Hold shift to jump forward or backward.
One aspect many of us have included in our Simple Life is having a garden. Our goal is to provide food for our family, seasonings for the food we create, or even just being able to walk outside and gather a bouquet of fresh flowers to decorate our home.
But as with any endeavor, we need to plan our garden, long before we dig the first hole. For today’s podcast, we will start thinking about where we are going to place our gardens, what we will plant, and how we will tackle this project. Listen in for some easy tips to help you get started.
The Farm Wife (website)
Let's Visit! (email)
Amazon Shop Page
Podcast Workbooks
Great Products by The Farm Wife:
The Simple Life Workbook
Simple Life Home Finance Bundle
The Art of Homemaking
Find other helpful Simple Life Products in The Farm Wife Shop
Do you want to learn more about living a simple life? Then a great place to start is with the books in my Simple Life Series!
Living a Simple Life on the Farm (my story)
How to Cook a Possum: Yesterday’s Skills & Frugal Tips for a Simple Life (don’t worry – this isn’t a cookbook!)
Faith & a Simple Life
FICTION
One aspect many of us have included in our Simple Life is having a garden. Our goal is to provide food for our family, seasonings for the food we create, or even just being able to walk outside and gather a bouquet of fresh flowers to decorate our home.
But as with any endeavor, we need to plan our garden, long before we dig the first hole. For today’s podcast, we will start thinking about where we are going to place our gardens, what we will plant, and how we will tackle this project. Use these tips to help you get started.
Tip #1
Plants need 4 things to survive. The first is sunlight.
When you survey your area, you need to know not only where the sunniest patch is, but also the path of the sun. In the middle of the day, the spot where you would like to plant your garden may be considered full sun. But if there are trees or other tall structures on the east or west side, you may not have full sun all day.
And, if your trees are on the east side, the sun may not clear those trees until 10 or 11 in the morning. If your trees are on the west side, your garden may be getting too much shade by 2 or 3 in the afternoon. That means your garden will only get the sunlight it needs for 3 to 4 hours, maybe 5. This is perfect for plants that require shade but can be detrimental to those that need full sun.
Most vegetable plants require at least 8 hours of sunlight per day. If you place your garden in a spot that only receives part sun, it may still produce, but not as well.
But don’t think this means you can’t garden. Even some of the vegetables that love warmer weather will appreciate a bit of shade during the hottest days of the year.
The next requirement is Water.
Once you choose your location, you then need to find the easiest access to water. For most gardeners, that means a water spigot in close proximity.
It also means using water hoses. The closer your garden is to your spigot, the shorter and fewer hoses you’ll need.
Sprinklers are a fairly popular way to water your garden. This is an option, but not the best one. First, some plants, such as tomatoes, don’t like being watered overhead. Wet leaves tend to burn in the sun. A second factor is you use more water trying to get the moisture level to reach the root system. The third consideration is evaporation. More water sits on the surface, and is then evaporated into the air, rather than reaching the roots of the plants.
For an inground garden, soaker hoses may be the best option. Soaker hoses sit on the ground next to the base of the plants. This allows the water to seep into the ground quicker and deeper than overhead watering.
If you add mulch, such as straw, leaves, or compost over the top of the soaker hoses, it helps curb the amount of evaporation, which means watering a little less.
The next requirement is Optimal Growing Temperatures.
If you start your plants from seed, most will not germinate if the soil is below 50 degrees. Some, such as cucumber and eggplant prefer a warmer soil at 60 degrees; lettuce likes it cooler and can be planted as low as 35 degrees. However, this also needs to be regulated – a sudden drop in temperature for several days in a row may either delay the germination or stop it altogether.
Different plants love different daily temperatures and have different maturity dates. Where tomatoes and peppers require 70 to 90 days, lettuce takes 40 to 60, broccoli and squash take 50 to 65. However, each one of these requires different temperatures.
Before you start your seeds and plant your garden, be sure to check the thermometer and maturity dates. This will help you to get the best harvest from your plants.
And of course, all plants need food to grow. One of the best ways to have a healthy soil is by adding compost. If you have a space in your yard, you can build and maintain a compost bin as large as you have room.
However, some folks don’t have a hidden corner where they can start a compost pile. If that is the case, consider using mini compost bins. With these you can use small plastic milk crates. Keep in mind, the amount of compost you get with these is sufficient to supplement containers or a small garden area – not a huge garden. If you want to build these, check out the link for my post Mini Compost Bins in the show notes.
If you need more compost, you may consider searching nearby for companies who sell it by the yard or truck load.
Tip #2
A successfully productive garden is a matter of timing. Before you plant the first seed, you need to know the dates of your first and last frost. From there, count backwards to determine when you need to start your seeds. Count forward to make sure you have enough time for your plant to grow and produce.
To get the dates for my area, I use the Farmers’ Almanac calculator. The Farmers’ Almanac is a trustworthy source for all your garden needs and is frequently used by all gardeners! Just put in your zip code and click. You will get your frost dates, as well as the length of your growing season. I’ve added the link to the show notes for your convenience.
Knowing your frost dates isn’t the only Zone information you need. There are some plants that simply cannot grow well, if at all, in your climate. This has to do with the number of days to harvest.
A good example of that is peppers. Peppers are a heat-loving plant and take 60 to 90 days from seed to produce. If you live in the North, these may be harder to grow.
On the flip side, carrots, broccoli, and cabbage don’t mind colder weather. They won’t hold up under a freeze but are cold-hardy plants. Since these vegetables turn starch into sugar to help protect them from frost, they also taste better.
There are ways around what you plant and when. You can start your seeds in a greenhouse and put them in the ground as soon as the soil is warm enough for the plant. You can also extend your growing season to some degree using a warming system, such as cloches and plant protectors. However, you may only want to use these to harvest those last few vegetables that are on the verge of ripening. They aren’t truly recommended for year-round gardening.
Tip #3
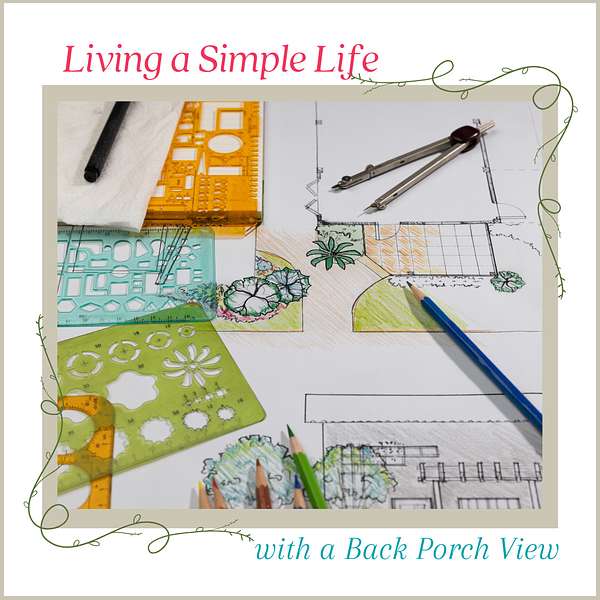
Going ‘off grid’ can be of interest to many people. However, when you plan(t) your garden, go ‘on grid’ – or rather, sketch out your garden on paper.
Once you know the size and location of your garden, sketch it out. This helps you to see what you are planting, where it will be planted, and proper spacing before you dig the first shovelful of soil.
A great way to do this is by using graph paper. Each square on this type of paper equals a certain size – most of them are 1/4″, but others come in 1/2”. You can determine what each square represents in size. For me, I use a 1/2” graph paper, and each square equals 1 foot. Or just use a piece of regular paper. Either way will help you visualize how you are going to lay out your garden.
Once you have the entire garden drawn out, it’s time to add the plants. The easiest way to do this is to cut out circles, squares, or even rectangles. This makes it easier to move your plants around, until you have the best design for the space.
Here’s another tip: Use colored pencils for each plant. This allows you to see at a glance which circle is a tomato, and which one is lettuce.
If you’re only able to grow your plants in containers, you can still use this tip. Measure your balcony, patio, or yard space.
From there, add in any furniture and other items that are normally used in that area. Once you have this basic plan on paper, you can begin to place your containers. You can more easily move ‘paper’ containers around than you can real ones filled with soil.
Once your grid is laid out, you can then put empty containers in place. Once you are satisfied with the location, then you can begin filling your pots with soil.
Tip #4
I’m one of those gardeners who just wants to plant everything! Unfortunately, I don’t have the space to do it.
To have a productive garden means you need to care for it daily. Between working hours, chores, and other activities on our calendars, finding the time can be tricky.
The key is to design a garden which can easily be cared for within the amount of time you have. Be sure to make notes on your calendar the dates you need to water, when to feed your plants, and when to prune.
And be sure to keep an eye on those weeds! Unfortunately, weeds don’t grow on any given schedule. Instead, they seem to pop up on their own time. At the very least, set aside an hour or so every two to three days to clean up the unwanted sprouts. Just remember, a few minutes every day will keep weeds at bay. Wait a day or two, and they may just take over your garden!
Tip #5
Many people garden by putting all the seedlings of one type of vegetable, like tomatoes, in the ground at once. When it comes to harvesting, everything is ready at one time, and there is not only more work to get them picked, but you also have more than you can eat.
If you can and preserve the harvest, you spend all day, almost every day, trying to process and put it all up at one time. And you may end up losing some, because you can’t do all of your canning and preserving in one day. Instead, it could take weeks. While you’re busy trying to harvest and can all those tomatoes, your peppers, okra, and squash could be getting too ripe to use. And then there’s the fact that once your garden is over, you begin lamenting the fact you don’t have any more fresh vegetables to enjoy.
Smart garden planning will help you stretch your harvest out to better accommodate your enjoyment and time by using the Succession planting method. This means to stagger your planting times. Succession planting requires using plants that are at different growth stages. If you are starting with seeds, sow one-third to one-half of your seeds at a time, and space the next seed sowing time out by two weeks.
When planting your garden, put in the oldest seedlings first. Two weeks later, put in the next batch, and then, if you have a third round waiting, wait another two weeks. This means each set of plants will mature at different times, allowing you to enjoy them fresh longer, and still have enough to preserve.
Using the Rotation gardening method helps to prevent the depletion of nutrients that one plant loves and replenish it with a different crop. An example of this would be corn, rotated with beans the first year, and then wheat the second year. Corn is a heavy feeder and will deplete the soil of nitrogen. Beans, on the other hand, have nitrogen-rich nodules on their roots and will deposit it back into the soil. Adding wheat to the rotation helps improve soil health and structure.
Crop rotation is also beneficial as it breaks the cycle of detrimental insects. If vegetables are planted in the same place every year, it becomes easier for pests, such as tomato hornworms, to find the plants and have a feast.
Tip #6 –
Smart garden planning also means using mulch in your garden. Mulching helps to keep the weeds down and retain moisture. Some of the best mulches you can use are newspaper (just plain newsprint, not glossy color ads), cardboard, and wheat straw.
It isn’t the best option to use hay. It has too many seeds in it and creates a bigger weed problem in your garden. Save the hay for your compost pile. The heat generated in the pile will kill the viability of the seeds in most cases.
But gathering enough mulch for your garden also means you need a place to store it. Cardboard sheets can be slipped into the back of a closet, and newspapers can be collected in boxes or garbage bags.
However, wheat straw and piles of mulch need to be stored outside. If you choose to keep mulch on hand, find a suitable place to keep it, such as a shady area behind a storage building, or under a shed. If it’s exposed to the weather, be sure to cover it with a tarp to protect it as much as possible.
Now it’s time to plant your garden! Grab your calendar, seed catalogs, a notebook and pen, and settle in for an Afternoon Tea break.
And as you plan this year’s garden, go ahead, and think about next year’s, too. This way, you will have your Rotations in place and be ready to start your garden as soon as your last frost date arrives.
If you want to learn more about living a Simple Life, just visit my website at www.thefarmwife.com/ . If you’re enjoying listening to these podcasts, please support the show by clicking the SUPPORT button in the show notes. When you do, you’ll be helping me continue bringing you fun and helpful ideas for living the Simple Life you love!
If you have questions or just want to stop in for a visit, you can do that through email at thevirtualporch@gmail.com. And be sure to subscribe – you don’t want to miss a single conversation. I'll be sitting on the porch every Monday morning waiting for your visit!
Thanks again for stopping in. I will see you next week on Living a Simple Life with a Back Porch View. And while you are waiting for the next episode, grab that glass of refreshment, pull up a rocker, and sit back for a while. It’s time to relax and enjoy.